22. Skeletonizing an image
22.1. Dr. Tirthajyoti Sarkar, Fremont CA 94536
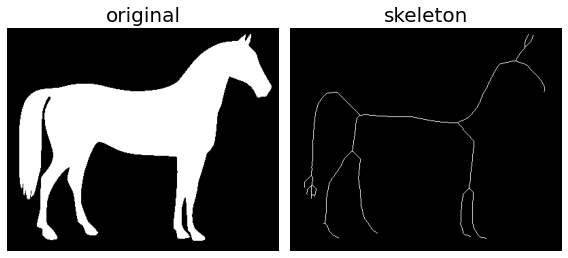
Skeletonization reduces binary objects to 1 pixel wide representations. This can be useful for feature extraction, and/or representing an object’s topology.
In Scikit-image, skeletonize function works by making successive passes of the image. On each pass, border pixels are identified and removed on the condition that they do not break the connectivity of the corresponding object. The image is correlated with a mask that assigns each pixel a number in the range 0 - 255 corresponding to each possible pattern of its 8 neighbouring pixels. A look up table is then used to assign the pixels a value of 0, 1, 2 or 3, which are selectively removed during the iterations.
from skimage.morphology import skeletonize
from skimage import data
import matplotlib.pyplot as plt
from skimage.util import invert
22.2. Load and invert the horse image
image = invert(data.horse())
22.3. Perform skeletonization
skeleton = skeletonize(image)
22.4. Display
fig, axes = plt.subplots(nrows=1, ncols=2, figsize=(8, 4),
                         sharex=True, sharey=True)

ax = axes.ravel()

ax[0].imshow(image, cmap=plt.cm.gray)
ax[0].axis('off')
ax[0].set_title('original', fontsize=20)

ax[1].imshow(skeleton, cmap=plt.cm.gray)
ax[1].axis('off')
ax[1].set_title('skeleton', fontsize=20)

fig.tight_layout()
plt.show()
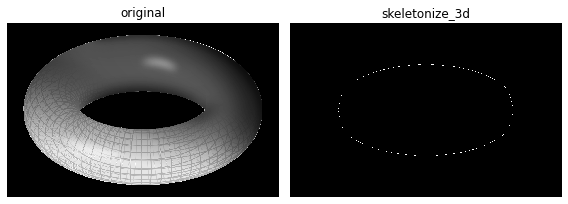
22.5. Skeletonize 3D images
Scikit-image function skeletonize_3d uses an octree data structure to examine a 3x3x3 neighborhood of a pixel. The algorithm proceeds by iteratively sweeping over the image, and removing pixels at each iteration until the image stops changing. Each iteration consists of two steps: first, a list of candidates for removal is assembled; then pixels from this list are rechecked sequentially, to better preserve connectivity of the image.
from os import getcwd
from skimage.morphology import skeletonize_3d
from skimage.color import rgb2gray
current_dir = getcwd()
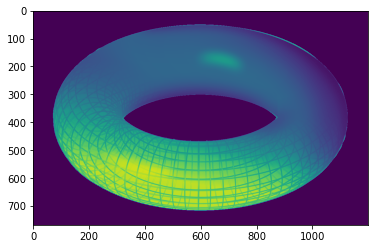
data = plt.imread(current_dir+"\\Images\\torus3d.png")
data = rgb2gray(data)
c:\program files\python37\lib\site-packages\ipykernel_launcher.py:1: FutureWarning: Non RGB image conversion is now deprecated. For RGBA images, please use rgb2gray(rgba2rgb(rgb)) instead. In version 0.19, a ValueError will be raised if input image last dimension length is not 3.
  """Entry point for launching an IPython kernel.
plt.imshow(data)
plt.show()
skeleton3d = skeletonize_3d(data)
fig, axes = plt.subplots(1, 2, figsize=(8, 4), sharex=True, sharey=True)
ax = axes.ravel()

ax[0].imshow(data, cmap=plt.cm.gray, interpolation='nearest')
ax[0].set_title('original')
ax[0].axis('off')

ax[1].imshow(skeleton3d, cmap=plt.cm.gray, interpolation='nearest')
ax[1].set_title('skeletonize_3d')
ax[1].axis('off')

fig.tight_layout()
plt.show()